Adding data
Dalliance is designed to make it easy to add your own data, or data from public collections. There are currently two different approaches for adding data: DAS is rich and flexible, but requires you to run your own server. Binary formats are less flexible, but easy to set up. We expect to support more file-based formats, including VCF and GFF, in the near future.Adding data via DAS
Dalliance is a Distributed Annotation System (DAS) client, so you can add arbitrary data by running your own DAS server. DAS is still the richest and most flexible way to add data, although other approaches (see below) may be easier and perform better for large datasets.
There are a number of tools to help you run a DAS server. Perl users will probably prefer Proserver while Java-ish people might like Dazzle
Once your server is set up, you can either add the track directly using the Add track -> Custom option, or you can add it to the DAS Registry, in which case it should show up in the track browser directly.
Dalliance includes a full implementation implementation of the DAS/1.53 and DAS/1.6 stylesheet systems, and this is the preferred way for controlling how your data appears.
Adding indexed binary files
Dalliance can integrate data from certain types of indexed binary file directly, without any software support beyond that provided by normal web servers like Apache HTTPD. Indexed binary data can also be viewed directly from disk, with no server requirements whatsoever. This is potentially the easiest way to add your own data to Dalliance. It may also have performance advantages over traditional DAS, especially when you have larger numbers of features or a slow network connection.Because these formats have a relatively compact index data structure associated with the primary data, Dalliance can access the index and only fetch the required data, even though data covering the whole genome is combined into a single file. The great majority of modern web server software can return arbitrary portions of a requested resource (using the Range header to specify the desired portion).
Preparing binary data
Currently-supported formats are:
- bigBed (make from a BED file using bedToBigBed)
- bigWig (make from a WIG fiel using wigToBigWig)
- BAM (can be produced from most sequence alignment formats using, e.g., samtools
- .2bit (only for reference genomes)
Configuring your server
(You can skip this if you are only interested in accessing local files).
In principle, you can just drop a binary file on a web server and access it from Dalliance. However, unless you are able to host the file on the same server as the Dalliance code itself, fetching the data requires cross origin requests, and a little server reconfiguration may be required if such requests are to succeed. Assuming you’re using the common Apache HTTPD web server, the following configuration should do the trick:
    Header set Access-Control-Allow-Origin "*"
    Header set Access-Control-Allow-Headers "Range"
The first line is the standard header for enabling cross-origin requests. The second is slightly more subtle: by default, cross-origin requests are restricted to simple HTTP requests without custom headers. The extra CORS header means that Dalliance can initiate requests which use the Range header in order to fetch just a small portion of the data.
The simplest place to put these lines would be in a .htaccess file in the same directory as the binary content you with to view with Dalliance. If you are lucky, this will work even if you just have a personal directory on a web server operated by somebody else. However, some web servers have been configured to ignore .htaccess files, and even those that do may not be configured to allow custom headers. If this doesn’t work, you have two options:
-
Ask the server administrator to enable
.htaccessfiles and ensure that custom headers can be configured (briefly, this requires thatmod_headerbe loaded, and that ”AllowOveride FileInfo” be configured). -
Place the ”
Header set” directives in the global configuration file instead. They can be placed inside aDirectorysection if you do not wish them to affect the whole server.
Using binary data tracks
Adding binary data to Dalliance is a very similar process to adding custom DAS data. Click the “Add track” button and then select the “Binary” tab.
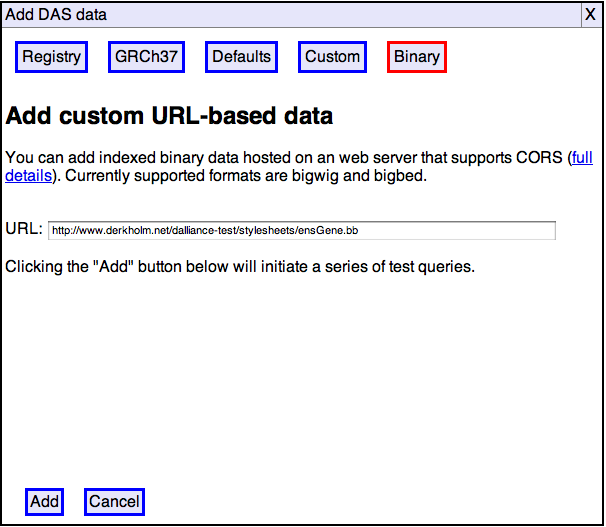
Enter the URL where your data is hosted, or select a file, then click “Add”.

Check the track name and coordinate system, click “Add” again, and you’re done.